By Carl Tatz
Although there have been several good articles written recently on home studio acoustics, none have specifically addressed the monitoring system performance itself. At the risk of sounding overly dramatic, the information that is about to be conveyed to you in this article, if followed, may be the most valuable piece of information ever presented to you in reference to your home studio control room. So profound in fact, that it will revolutionize your perception and use of what you thought you could and could not achieve in your home work environment. And that is this: You can have a world class monitoring system in your home studio! No smoke blowing up any skirts here. We’re talking 20Hz(or lower) to 20kHz here folks and frequency responses you have only dreamed about and had only associated with high-end mega studios. And not only that, but accuracy that will enable your mixes to travel and sound right on other systems which of course is the ultimate goal of any mix. A properly calculated room with some effective acoustic treatment, a pair of near-field monitors properly set up respective of modal positioning for speakers and engineer, a sub-woofer system with two cabinets and 360 degree phase control and a really good stereo parametric equalizer will net a monitor system in your home studio that you can truly mix on keeping in mind that even professional studios don’t take the time to use this technology!!!!!! I know this sounds outrageous but by way of example, we’ll take a look at the general protocol that enables us to design an affordable system of this caliber in your studio.
Is This Really Gonna Work?
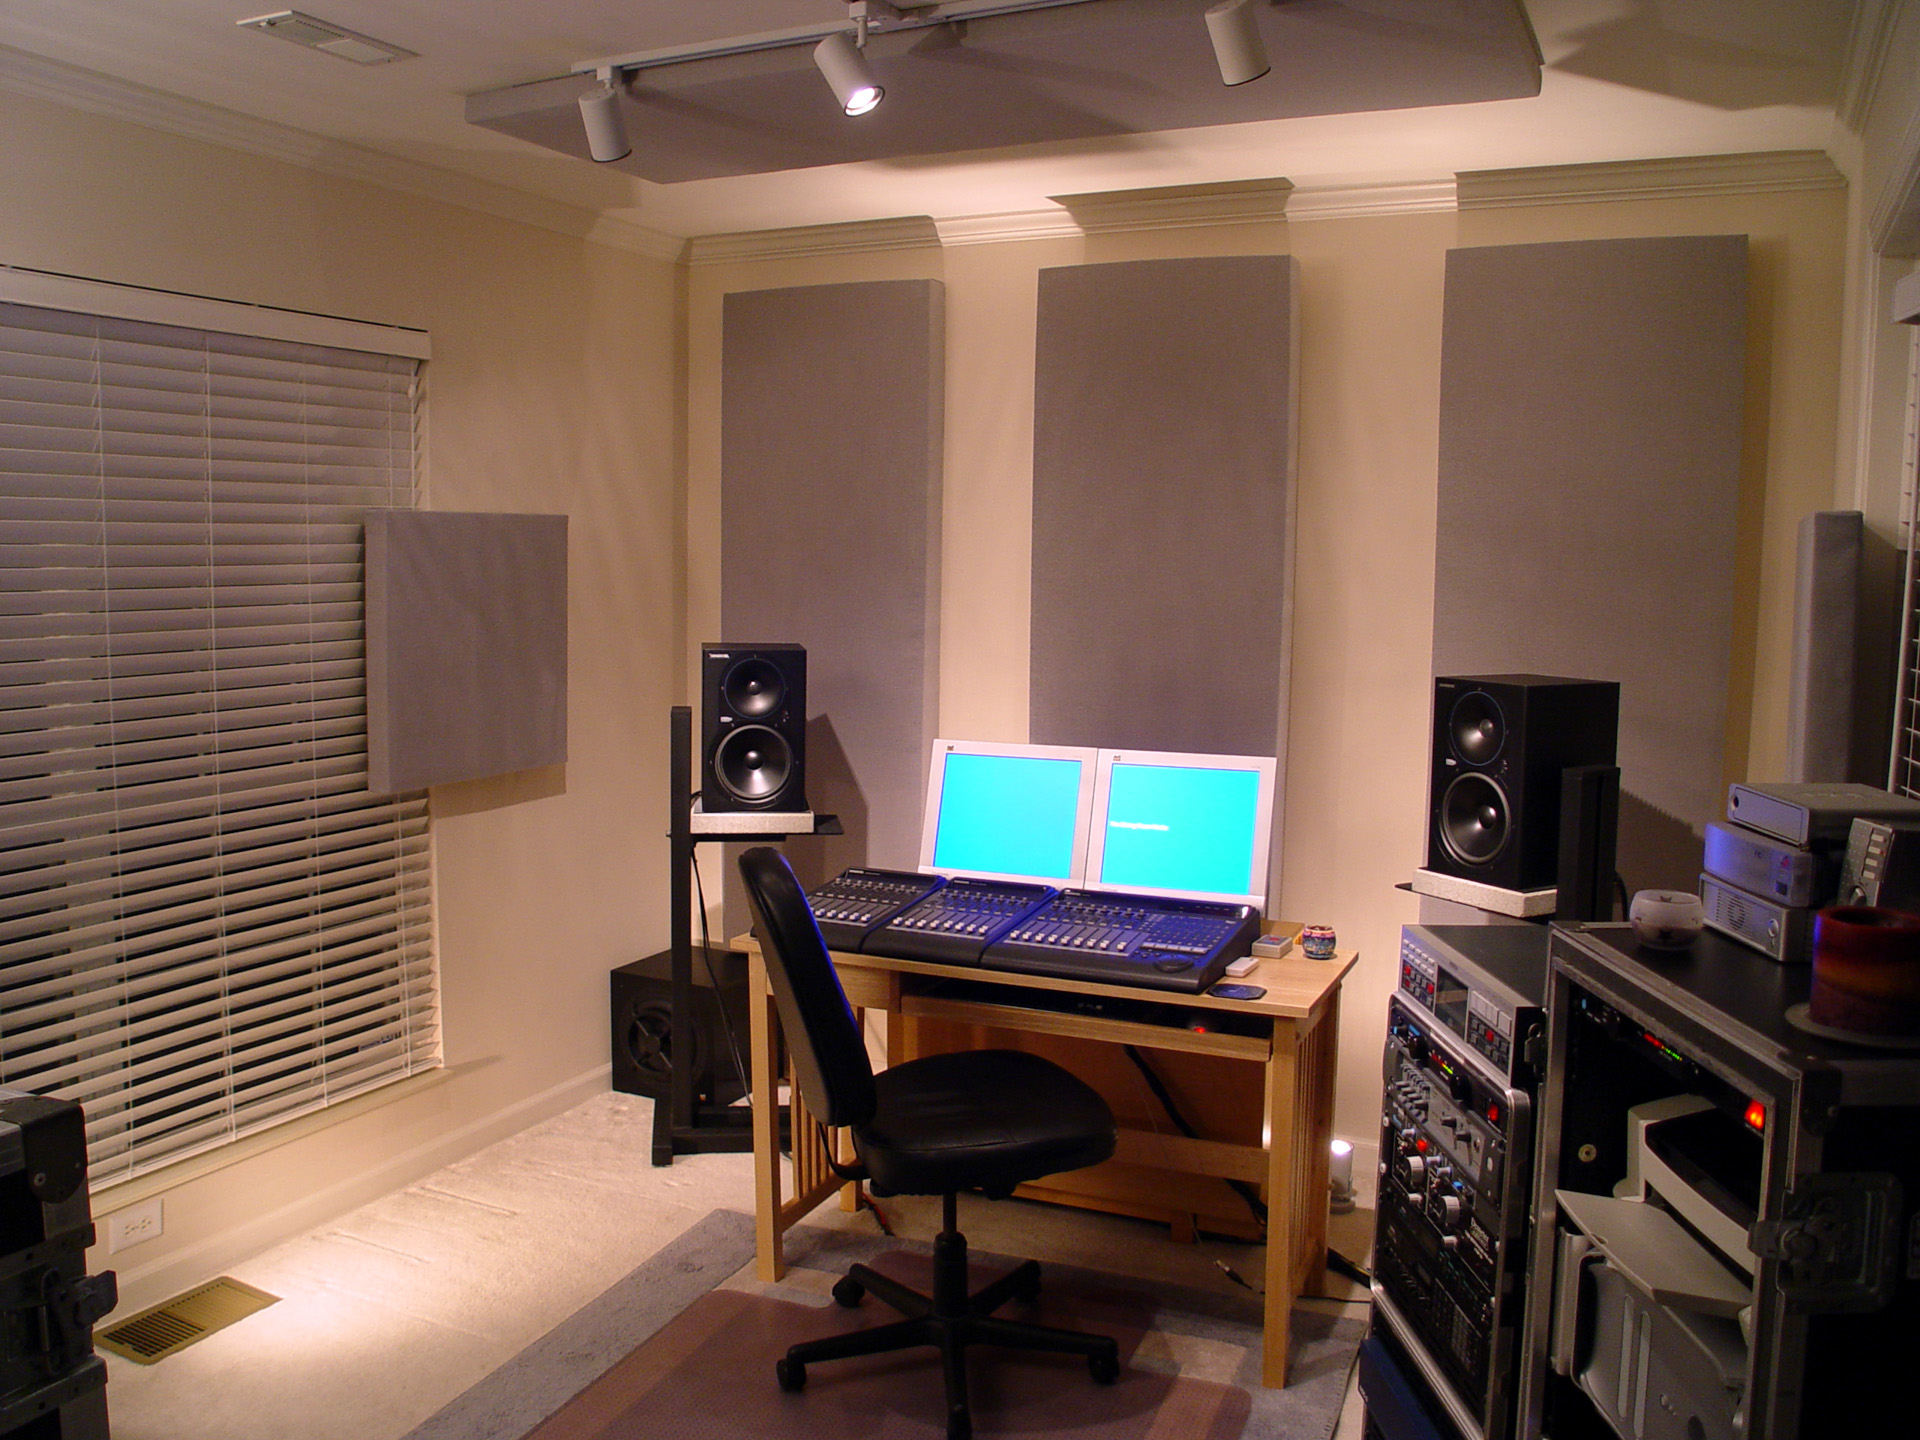
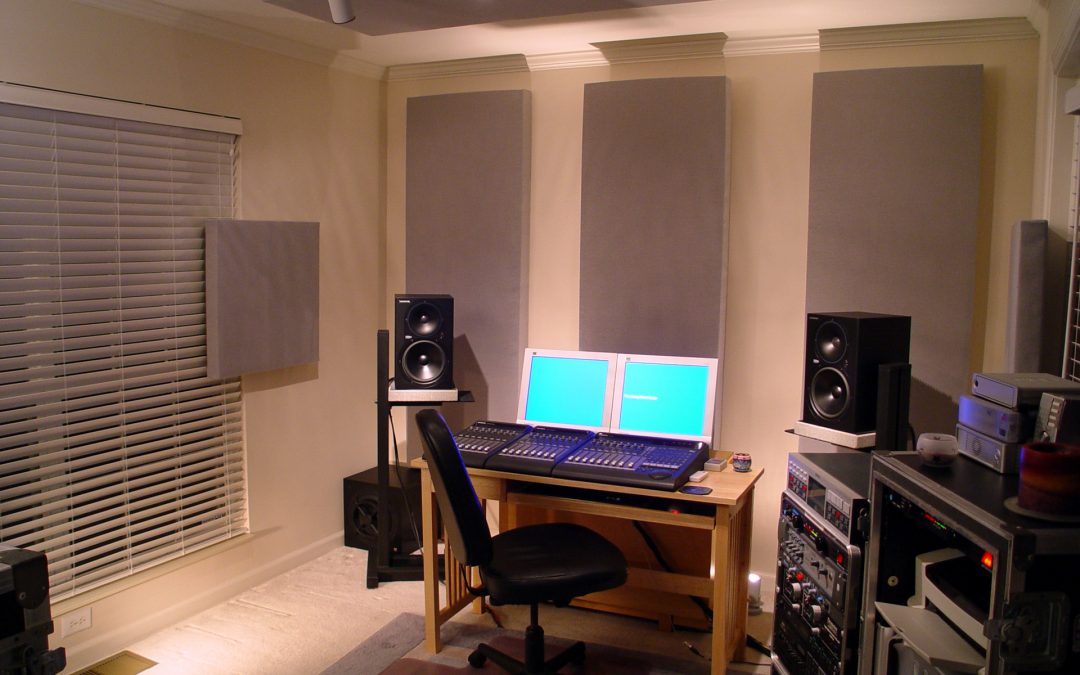
I was recently contacted by veteran star engineer Bob Bullock (Shania Twain, etc.), who had heard of the work I was doing relative to the above. He felt that he might be able to reference his mixes and work on his development projects at home if he set up a small control room and a simple Pro Tools system but was reluctant since he was such a huge fan of big SSL’s and large monitoring systems in major rooms. Although skeptical, he agreed to engage my expertise and we were off and running. A dining room that was not being used was chosen and the first thing I asked him to do was to send me the measurements, approximately 12’x10’x8’, length, width, height as well as photographs of the room. There was a large opening into a living room on the right wall that I had him fill with a pair of French doors and Venetian blinds to create symmetry and match the large blind filled window on the left wall. There was also a small door opening at the back wall. I designed a series of acoustic panels and specified their placement.
The room dimensions were now calculated. If we were building a room from scratch we would have the luxury of maximizing the dimensions for the smoothest modal response throughout the room. However, since most home studios are located in existing spaces i.e. bedrooms, dens, basements, bathrooms (I hope not), we typically have no control over room dimensions the way we would if we were building a new room. Therefore, although limited, it is to our great advantage and convenience that we primarily have only to satisfy the frequency response performance of the engineer’s sweet spot and this can be done very successfully. The dimension calculations were not pretty but because we had an opening in the rear wall and could open the rear French door without affecting the symmetry at the engineer’s position, we were able to assume that we would be able to control the problem axial modes without resorting to membrane absorber modules. This can often be the case as long as isolation is not a major issue. In Bob’s case it wasn’t since he had the house to himself during the day and ordinarily didn’t want to work at night.
Does My Hair Look All right?
Now here’s the fun part. By referencing our calculations as a starting point for speaker position, we embarked on a journey to the shores of acoustic serenity. It was critical that height adjustable speaker stands were used so that we could position the near-field speaker’s woofer relative to the height axial modes as well as the engineer’s ears. Armed with analyzing microphone and high-resolution software as well as a tried and true speaker distance formula of mine, we took many “snapshots” as we moved his speakers incrementally until we found the position for the best overall frequency response. At this point, the imaging was very good yet would get even better once we laser aligned. This is usually done later so as not to disturb the set up while we continue working. It is interesting to note here that because of the room’s eight foot height, Bob’s ears would be at 48”and right in the middle of the first and third axial height modes’ null points. According to our calculations and what we saw on our frequency graph snapshots, we would hear a dip at 71Hz and 212Hz. We verified this by listening to one of our reference CDs. Sure enough, as I had Bob raise himself up out of the seat and out of the null points about three inches, the dips filled in and the track sounded a lot better. However, Bob was not looking forward to sitting on a highchair while he was mixing and was concerned. I assured him that I had some tricks up my sleeve that I thought would solve this problem.
It Takes Two To Tango
It is absolutely imperative that two correctly placed subwoofers are used since by doing so we immediately cancel the first and third width axial modes and often the second and fourth depending on the room and positioning. This is a very good thing since everyone wants to sit in the center of the width of the room. The other mandatory requirement for a subwoofer system is that it has phase control over 360 degrees, which allows for some amazing tuning capabilities. Subs with 0/180 phase switches are basically useless for this kind of work.
In Bob’s room our snapshots told us to place the subs in the front corners with a 90-degree phase shift. This gave us a room down 3db at 25Hz and filled in a big hole around 100Hz relating to a null at the second order width mode. Not bad since the subwoofer system was speced out to only go down to 30Hz. Now this monitoring system had some real meat that Dr. Atkins would highly approve. At this point the skeptical Mr. Bullock would not have dreamed of letting me take the sub system back with me. And, thanks to adjusting our speaker height, ceiling treatment and subwoofer placement, the problem height null was attenuated and the dreaded highchair was not needed. However, we were not done yet because the finishing touch, the maraschino cherry, was about to be placed on top of this acoustic sundae.
Call The Fire Department
Equalization, like fire, can be your friend or your enemy depending on how you use it and unfortunately the latter has been the case all too often in the past for various reasons. The first reason is that there were some bad equalizers and some even worse analyzers in the early days of equalization. The second reason is that it’s hard. It’s hard and if you don’t know what you’re doing you will undoubtedly screw up. This acknowledged, let it be said that if a good parametric equalizer is used by a knowledgeable and experienced small room acoustic designer who preferably has a musical background and is studio savvy, EQ will ALWAYS improve the system. The argument has been that EQ is bad because it causes phase shift. Well guess what? Your prized true, flat, accurate and trusted near-field monitors that look so good on their anechoic chamber speck sheet don’t perform that way in your room. In fact they might stink! (We’re mostly concerned with smooth low end here). Even if you think they sound pretty good, it could be based on some pleasing peak below 160Hz that has nothing to do with accuracy. And why would they stink in your room? Phase shift. Phase shift due mostly to the axial modes caused by your room’s boundaries. And how do we correct phase shift? With phase shift. Ah ha! So we now see that phase shift can either be friend or foe. We fight fire with fire. The tools at our disposal for controlling phase are EQ; acoustic treatment; digital delays and analog phase shift circuitry (all pass filters) as well as speaker/listener positioning. However, equalization affords us the most detailed control possibilities.
Because of our meticulous work in positioning the speakers and subs, using corrective phase to tune in the low end and modest acoustic treatment, equalization to smooth out the system was minimal since we had no serious problems. Again, snapshots were taken, EQ was applied, and then we would listen and so on until we felt that we had maxed out the system. At this stage, Skeptical Bob became a true believer. I went ahead and laser aligned the speakers and finished off my documentation that would latter be presented after all the calculations, drawings and acoustical measurements were printed out. It makes for a very impressive coffee table book when company comes to visit.
Want to See My Etchings?
Bob quickly realized that he now had the ultimate studio toy, far more impressive than any piece of sexy gear with flashing lights in a rack regardless of the price. This was evidenced a few days later when he told me over the phone with tired enthusiasm that he and a friend had been up till 3:00 A.M. listening to CD after CD and marveling how this was the way they always dreamed monitors were supposed to sound.
Don’t Try This At Home – Alone
Taking the step toward having a monitoring system like this in your home studio will be the single most exciting and best investment you could possibly make. It will inspire confidence in you to do great work more than any piece of gear you could buy including a fancy new console and a lot less expensively. Also, as mentioned earlier, by saving on studio costs in certain instances, you will be able to invite high-end engineers to mix in your studio with no apologies for the monitoring. Imagine the look on his or her face when they start playing their first reference CD!
Aside from building or buying and installing your own acoustic treatment, I strongly recommend that you hire a professional to help you with this stuff simply because it’s so important to what you do. At the same time learn as much as you can. There is a plethora of info out there. Just type in acoustics in your search engine and see what I mean. The more you understand the basics, the better you will be able to communicate with your acoustic professional. There are some cool software programs available like Room Sizer and Room Optimizer from RPG (www.rpg.com) or Pilchner Schoustal’s Acoustic X (www.pilchner-schoustal.com) and powerful analyzing software from SIA SMAART (www.siasoft.com) or hardware like Meyer Sound’s SIM system (www.meyersound.com). They can be very valuable and effective tools as well as educational, but can present quite a curve in learning to use them well. Think back when you started to learn to play your instrument. It took a long time before you were willing to venture out of your bedroom, much less perform in public. Calculating and tuning a room is not easy and requires a lot of experience and know how if your looking for these kinds of results. There’s a lot more to it than holding up an analyzer and twisting some knobs on an equalizer. Chances are that you will quickly become frustrated with the tedium of the speaker placement ritual and exasperated when you find that after you were sure you had done everything right, it sounds like hell and or sounds like hell on other systems. It’s a perfect example of a little bit of knowledge being a dangerous thing. The closest analogy I can think of for tuning a room is an engineer mixing a record and the really good ones know what they want to hear and what it will sound like when it’s done. Also note, that although it may be a great temptation to think that you can solve all your problems by buying one of these one size fits all control-room-in-a-box acoustical products, keep in mind that they really work and that can be a problem. Without accurate calculations and knowledgeable high-resolution measurements, the treatment can very likely be destructive rather than constructive to the goal of a smooth frequency response in your room. Again, your goal is to have that warm fuzzy feeling that you know it’s right. One other comment in reference to some of the new programs that EQ your speakers automatically with the use of an included microphone and software. Without going into depth, I feel that they might be somewhat helpful for the traveling engineer but far from a substitute for a true tuning. Think software that will automatically mix your record. Just click on the genre – rock, country, pop, jazz or classical and away you go…………. And it’s so easy.
Also, a word of caution; the above is in no way a substitute for a fully designed control room by a competent designer. Your room will, no doubt, have many anomalies such as rattles and modal bumps and dips throughout the space that you can either choose to correct or accept. However, the point is that you definitely can have a world-class sweet spot in your home studio by following this procedure.
Action To Take
If you are ready to take the plunge of joy and hire a small room acoustic professional, then begin by taking careful measurements of your room’s dimensions and enough photographs to show what your room really looks like. You will be asked questions about its construction and what kind of walls, floor and ceiling it has since this will impact the acoustic calculations and treatment recommendations. In most cases, depending on whether or not you choose to buy or build your own treatments, you will be amazed at how inexpensively this can be done. And with a few décor and lighting tricks, it can look phenomenal too. On the other hand, if your goals are to seriously acoustically isolate the room from the rest of the house or you’re looking for a more traditional studio finished “look” that would require you to bring in a studio construction crew, then your investment would increase. After the room has been treated as per your acoustic professional’s specifications, he will arrive with his arsenal of acoustic toys and work his magic. This typically takes about two days. The first day is dedicated to speaker/subwoofer placement and tuning and the second day for equalization. You are sure to find it rewarding.
Carl Tatz is owner of Carl Tatz Design specializing in acoustic design, analysis and implementation for studio control room monitor systems and home screening rooms. He also owned and operated the internationally recognized studio, Recording Arts for eighteen years and is a Grammy nominated Jazz producer. For more information visit: www.carltatzdesign.com.